Tuesday, November 30, 2010

a veggie thanksgiving


After a lot of excitement and anticipation, a lot of recipe hunting, and a few days of planning and hard work, I am happy to share that my little Thanksgiving dinner went really well this year. It was a small party, with just me, my mom, and her boyfriend. With even that few people, it was tricky to think of what might please all of us, and also fit in with our individual dietary plans and restrictions. I felt most comfortable going a vegetarian route, but when I also started looking for low-fat options, I realized that vegan dishes were my best bet. So I managed a totally vegan dinner, and it was actually delicious!

I can't take all the credit though. I used an amazing resource online. The New York Times this year published a whole series of excellent articles on vegetarian Thanksgiving ideas and recipes. Everything included is very fancy and festive. I used three of their recipes and they were perfect. Take my advice and bookmark this link that shows all the recipes in one place, or better yet, print the recipes you like just in case they don't stay posted forever.

Here is my menu:

From the New York Times Well's Vegetarian Thanksgiving
  • Cranberry Chutney: A standing mixer is used to very slowly macerate the fresh cranberries in this chutney. They retain their texture and acidity more than they would if cooked.
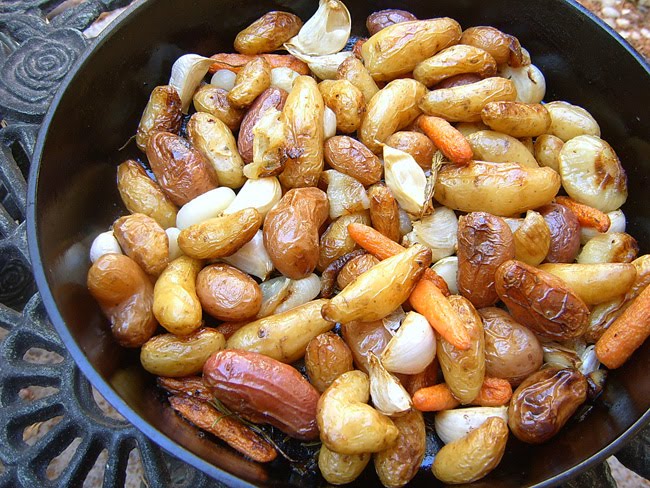
From Gourmet Magazine
Improvised
  • Green salad: Lettuce and spinach leaves, blanched asparagus, roasted beet slices (chilled), some home-grown sprouts, sliced radishes, tossed in Bragg's Healthy Vinaigrette.
A few notes just in case you make any of these dishes yourself:
First, I used Earth Balance in place of butter everywhere that it was needed. It is really similar in taste and consistency, is non-hydrogenated, and has half the saturated fat. Next, if you make the stuffed portobellos dish, I recommend French lentils since they stay firmer and don't break down to mush like the red lentils. If you make the potatoes and gravy dish, the recipe suggests that you leave the skins on the onions when making the stock. I have been making vegetable stocks from scratch for a long time, using my vegetable scraps from cooking, and I had a major breakthrough when I started removing the onion skins. Though they impart a lovely red color to a stock, they ruin it with a harsh bitter taste. The gravy is also a little on the thin side. Next time I would add some more flour.

You may be wondering about dessert. (Major sigh). Dessert was a flop. My plan was to do a vegan pumpkin pie. I thought this would be so incredibly easy. I suppose I was spoiled living in Humboldt County, CA where the Co-op up makes a vegan pumpkin pie that is so good, it doesn't taste different than a traditional recipe. I don't think I appreciated this feat. Now I do. I tried 3 pie recipes. The first one I think called for way too much silken tofu, because the pie filling became a really pale color. And it didn't taste much like pumpkin anymore. I had plenty of time so I decided to try again. I found another tofu recipe, but by then I had serious doubts about tofu so I decided to hedge my bets and also try a recipe that uses a milk of your choice (I used almond milk) and cornstarch. The former one actually had a greenish cast from the tofu; I don't know how that is even possible. And the latter never set up in the middle, even though I let it sit in the fridge overnight. So those ended up in the trash. (If anybody reading this knows the recipe from the Co-op let me know.)

Fortunately we had a lot of big laughs over the pies, so it wasn't bad at all. It was a fun time. I hope everyone else had a great experience too.

Tuesday, November 23, 2010

guilt-free holiday cookies


At last it is that most special time of year when it is time to get into holiday baking. I just love the traditional recipes of late fall and winter, usually so comforting and rich with warming spices. Most of the last month I had to take a break from the kitchen because I was off participating in a long meditation course in Washington State. Some of you may have noticed my absence. Well, it was a most fulfilling experience for me, but I did miss baking so much. Especially since I had looked at a whole bunch of great recipes right before I left. I need to remind myself not to do that again! But of course these were waiting for me when I returned home.

So far I have tried two holiday cookie recipes this season. The first ones, shown in the above photo, are called Coffeehouse Hermits, from a cookbook of Stefanie's called Vegan Cookies Invade Your Cookie Jar. This cookbook is mind-blowing. The recipes are so creative and all look so delicious; it doesn't surprise me at all that it has a 5-star rating on Amazon.

Hermits are very old-fashioned simple cookies. They are soft and molasses flavored, and studded with raisins. I have fond memories of these cookies from when I was little and my mom would buy us the Archway brand. I remember clearly the shop where she would pick them up by the train station near our house on Long Island. Well, these modern vegan hermits are even more delicious. A really nice sophisticated touch is made by the addition of coffee. I am not a coffee drinker, so I used a coffee substitute. These beverages, such as Pero or Cafix, are made from roasted grains and roots like barley, chicory, beetroots, and dandelion roots and I think they are so satisfying and shamefully underrated. If you are interested, they are in most supermarkets in the coffee aisle.

The recipe for the hermits is below. It is pretty straightforward. The one thing I found though is that they don't last long. After three days at room temperature in a sealed bag they started to dry out. If you aren't going to get through them very quickly, I suggest freezing some of them soon after cooling, to defrost later.

The second cookie recipe I tried was found when I went to the website for Post Punk Kitchen, the group responsible for the Vegan Cookies book described above. They have a ton of great recipes on there, so I tried one for Pumpkin Oat Cookies. Those are in the photo below, and the recipe can be found at this link. I can not stress enough how delicious these cookies are. I may never make regular oatmeal cookies again. My mom actually just called a couple of minutes ago to tell me that they are out of this world.


Lastly, I want to wish you all a Happy Thanksgiving. I hope you are spending it in the company of people you love. If you want some laughs to get into a celebratory mood, check out one of my favorite websites, Cakewrecks:When Professional Cakes Go Horribly, Hilariously Wrong. They just posted a series of Thanksgiving cake photos that are really funny.

And here is the recipe for hermits:

Ingredients:
½ cup canola oil
2 cups strong thick black coffee, cooled to room temp
1/3 cup molasses
2/3 cup sugar, plus additional for sprinkling
2 ¼ cups all-purpose flour
1 tsp. baking powder
½ tsp. baking soda
1 tsp. ground cinnamon
½ tsp. ground cloves
½ tsp. ground ginger
A generous pinch finely ground black pepper
½ tsp. salt
1 cup dark raisins

Method:
1. In a large bowl, whisk together the oil, coffee, molasses, and sugar until thick. Sift in the flour, baking powder, baking soda, cinnamon, cloves, ginger, black pepper, and salt. Fold in the dry ingredients till almost completely moistened, then fold in the raisins till a soft dough forms.

2. Chill the dough in the refrigerator (no need to remove from the bowl) for 30 minutes. In the meantime, preheat the oven to 350°F. Line two baking sheets with parchment paper.

3. After dough is chilled, lightly moisten your hands and divide the dough in half. Form it into two logs on top of the parchment paper, each measuring about 13 inches long and 3 1/2 inches wide. Leave 3 to 4 inches of room between logs as the dough will spread when baking. Sprinkle the tops of logs with additional sugar and gently press into dough.

4. Bake 24 to 26 minutes until the edges are lightly browned and the logs feel slightly firm. Cracked tops are fine, even traditionally desired with this cookie. Allow the logs to cool for 15 minutes, then with scissors or a sharp knife, slice the parchment paper between the logs in two. Gently slide each log with its parchment paper onto a cutting board. With a sharp knife, slice the logs into 2-inch-wide slices, using a single downward motion with the knife. Carefully move each slice onto wire racks to complete cooling.

Wednesday, October 27, 2010

mulligatawny soup with homemade almond milk

Saffron is such a gorgeous color, and stands out beautifully against the white of our homemade almond milk

     On a visit to my hometown in Pennsylvania, I noticed that my father-in-law had checked a cookbook out of the library entitled Splendid Soups by James Peterson. What an inspiring book! As I browsed through it, I was excited to discover a recipe for mulligatawny soup, because I had tried various versions at Indian restaurants and had often wondered how to make it myself. Once back in Vegas, Katherine and I got together and embarked on a mulligatawny soup adventure. It began at the local farmer's market, where we picked up the produce we needed for the recipe, as well as a beautiful loaf of artisan whole wheat bread and a bag of wild mache to use for a side salad. Then we headed home and spent a few hours preparing and enjoying this delicious lunch.
     This soup has a secret, magical ingredient... homemade almond milk! Sure, you can use supermarket almond milk, but as we found out, it's not only really fun to make your own, but the homemade variety tastes about a thousand times better. It was so unbelievably delicious, I could barely wipe the smile off my face. I have to admit, though, I didn't try very hard. Smiling cooks make good food, after all... or so I've heard.
     The following is the recipe as we made it. We didn't stray far from the original, changing only a few minor details.

Ingredients:
4 T. ghee (you can also use unsalted butter or Earth Balance margarine or coconut oil if you're vegan)
2 medium-size carrots, chopped
2 medium-size onions, chopped
2 garlic cloves, chopped
2 medium-size waxy potatoes, peeled and thinly sliced
4 cups vegetable broth plus 3 cups water
1 cup tightly packed spinach leaves
1 cup raw almonds, soaked overnight and 1 cup water (or about 1.5 cups store-bought almond milk - original, unsweetened)
1/4 tsp. saffron threads, soaked in 1 T. water for 15 minutes
2 T. ghee (or unsalted butter or vegan margarine)
4 tsp. curry powder
1/2 cup coconut milk
2 T. finely chopped cilantro leaves
salt and pepper

Method:
Melt the butter (or ghee, margarine or oil) in a 4-quart pot over medium heat and add the carrots, onions, garlic, and potatoes. Cook for about 10 minutes, stirring every few minutes, until the onions start to turn translucent.

Add the broth and bring the soup to a medium simmer. When the vegetables are soft and can be crushed easily against the side of the pot with a spoon, about 20 minutes, add the spinach leaves and simmer for 2 minutes more.

While the vegetables are cooking, use the almonds and water to make almond milk (see below for instructions).

Puree the soup in a blender or through the fine disk of a food mill. If you want the soup to have a smoother texture, strain it through a medium mesh strainer. Add the almond milk and the saffron with its soaking liquid.

Combine the ghee (or butter or margarine) and curry in a small sauté pan. Stir over medium heat for about 2 minutes, until you can smell the curry. Add this mixture to the soup.

Stir in the coconut milk and the cilantro. Season with salt and pepper. Bring the soup to a simmer and serve.

We garnished our soup with a quick pour of coconut milk and a sprig of cilantro, and had a hearty slice of toast and salad tossed with vinaigrette on the side.

Make your own almond milk!
The extra effort is entirely worth it, in my opinion.
You can use the milk for this and other recipes, but you can also use it for your cereal or in your tea, or any other way you might use dairy milk.
Soak a cup of raw almonds overnight. Cover them amply with water, because they will bloat up and the top ones won't be soaking anymore unless you use extra water. When you wake up in the morning, change the water. When you're ready to begin, squeeze each almond between your thumb and index finger, and the skins should pop right off. Once you get the hang of this technique, it's very easy work. Then, simply blend the almonds with a cup of water in a blender, until smooth and creamy. You may need to add more water, a little at a time, to achieve the desired consistency. Next, pour the almond pulp into a nut milk bag or onto a double layer of cheese cloth over a bowl. Close the bag, or gather the sides of the cloth, and start squeezing it until almond milk begins to drain into the bowl. This process is amusingly reminiscent of milking a cow. You can store your almond milk in an airtight container in the refrigerator for a few days until you're ready to use it.

Wednesday, October 6, 2010

chinese tea ceremony

A pastime I want to share with you that delights me immensely is setting up a proper Chinese tea service. This is according to a tradition in China called gong fu cha, which translates to "tea brewing with great skill." I was first introduced to Chinese tea a few years back, when I started hanging out with a couple of good friends of mine, Chris and Jon, who at that time shared a house in the High Desert. Chris had a couple of bricks of a special tea from China that I was not very familiar with, called pu-erh. He had crafted a wonderfully rustic low table out of wood in the Asian style, and we spent many visits sitting there having conversation and making pot after pot of this tea in a little porcelain tea set. I became hooked, and back at home I began reading a pile of books about tea from the university library, and ordering tea supplies directly from China through eBay.

Pu-erh is made with a broad leafed variety of the traditional Camellia Sinensis plant which we all know so well from our black and green teas. However, this one is compressed, fermented, and the exciting thing is that it can be aged just like a fine wine, for upwards of a hundred years. Below is a picture of the various ways the tea is compressed. On the left is a brick of the ripened leaves. On the right is an opened small nugget or tuocha of the raw pu-erh leaves. You can see that it is more green in color because it hasn't ripened yet. (Since the 1970's, tea producers have learned how to artificially ripen the tea, so even a younger tea can be ripe too.) For me, it was just the thing I was looking for. I have made a strong commitment to a meditation practice that requires a renunciation of alcohol, but this interest in tea provides me the many pleasures available to serious wine enthusiasts. I can study the history and process of the cultivation, and can study the geography of the many regions of China where this plant is grown, essentially traveling and connecting intimately to far away parts of the world from home. Then there are the sensual details. A pu-erh tea is just as rich as a wine with tasting notes. I think of a ripened pu-erh as a big red like a Cabernet Sauvignon. While it isn't fruity, it is robust and has some of the similar notes: earth, roots, muskiness, tobacco, leather. And it has a similar creamy smooth full-bodied mouth feel. I also appreciate raw pu-erhs that are fresh and still look kind of green. These I liken more to a white wine, like a Sauvignon Blanc, with strong grassy notes. The teas are of course not refined like a wine; indeed they are very unrefined and rough, but I am charmed by that primal quality.

So the other part to this is the actual ceremony. I think that Japanese tea ceremonies are much more well-known than the Chinese. As far as I know, and keep in mind I haven't traveled to Asia before, the intention of the Japanese tea ceremony is to achieve the maximum refinement and beauty. This is very different than the Chinese, where beauty is important but the primary goal is to achieve the maximum best tasting cup of tea. It is much more casual, and I think practical. I won't explain all the guidelines, because other websites would do it better (see wikipedia for a good ex.). Above is a picture of my tea table with the various supplies. The vessel for brewing the tea is called a gaiwan, which is traditionally made from a special kind of clay called Yixing (pronounced Yee-shing). The small pots made from this clay are semi-porous, so they absorb the tea over time. It is said that after many years of curing, one can simply pour hot water into the pot, and it will make tea from this residue. Thus, a different pot is needed for each general kind of tea. The pots are very small so the tea becomes more concentrated without oxygen interfering, and boiling water is not only poured into the pot but over the top of the full pot as well, so that it becomes as hot as possible. A special tray is used to catch this extra water. I always find this copious pouring of water is very soothing, like the feeling I get from a fountain. Many different types of cups can be used, but I like celadon cups which are again very traditional. Celadon stoneware usually has a craquelure glaze, so there are these tiny cracks throughout that become darker as the tea stains them. A part of the ceremony is to brush water on these cups before use so the cracks become darker, and to appreciate the pattern which is similar to that of dragonfly wings. The pu-erh tea leaves can be used to make multiple pots of the tea, as many as five or six.

So there is my summary of many of the things I appreciate in this special tradition, at least regarding pu-erhs. I haven't even mentioned my second favorite Chinese tea, oolong, which employs the same ceremony but has different characteristics, so you may see a special post highlighting it someday. Because I know pu-erh isn't widely available, if you have never tried it and are signed up as a subscriber to the blog I would like to do what I can to send you a sample. Just let me know.

Stefanie's comment: I love the fact that Katherine has taken tea appreciation to the next level, savoring it like fine wine. Recently in a travel guidebook I read a Westerner's account of the impatience he experienced in witnessing a Chinese tea ceremony, and I'm sure there are many people who would find it frustrating to take so long to pour and drink a tiny cup of tea. For me, though, it is a reminder to take the time to enjoy life's simpler pleasures more often... and in much greater detail! Sure, you can grab a cuppa on your way out to work or absently sip your beverage while you're plugging away at your computer (not that there's anything wrong with that), but I found that Katherine's description was a beautiful reminder to set my multitasking aside every once in a while and slow down enough to enjoy every aspect of my cup of tea, thereby adding a few minutes of focus to my otherwise overstimulated daily life. And it's such a treat to yourself to do this. Spending an extra 30 seconds to notice the smell, the feel on your tongue, the subtleties of the flavor, etc. could add a significant amount of peace and mindfulness, and consequently, health and equanimity to your day. I hope you'll take Katherine up on her offer and try some of this pu-erh. It's really wonderful.

Monday, September 27, 2010

vegan mango pudding


"My friend asked me if I wanted a frozen banana. I said "No. But I want a regular banana later, so... yeah."
-Mitch Hedberg

It's officially autumn, and maybe you're already feeling a little nostalgia for the bygone days of summer. Or maybe you live in the Southwest, where the days are still quite warm. In either case, I would like to share an easy, healthful recipe that makes a perfect breakfast, afternoon snack, post-workout treat or dessert.

You will need to plan ahead a little bit and peel and freeze a ripe banana (this is the perfect thing to do when you have a few sitting on your kitchen counter that you fear might not get eaten in time), and then buy a mango and let it ripen for a few days. After that, all you need is a can of coconut milk. Just three simple ingredients. I really like to use the Magic Bullet blender, because it's the perfect size for this recipe. Here are the proportions:

1 frozen ripe banana
1 ripe mango, peeled and chopped
1/2 cup coconut milk

Place all the ingredients in the blender and blend until it's a creamy consistency. It will be thick and pudding-like, but it doesn't keep for very long without separating, so blend it right before serving.

One common source of confusion I've noticed among readers who post comments on cooking blogs is that many people (understandably) think that coconut milk is a dairy product. However, the term is a misnomer; it's not milk at all, but finely shredded coconut that has been soaked in hot water and strained through a mesh cloth to obtain a white, creamy liquid. It's completely vegan and offers some interesting health benefits. According to multiple informational websites, including this one, coconut milk contains lauric acid, which provides a boost to the immune system, and although it is high in fat, its chemical makeup is such that the fat is burned more easily than other types of fatty acids. Perhaps most perceptibly, it is cooling, delicious and filling. I find it to be a perfect snack after an intense yoga practice and I hope you will enjoy it, too.

One last note: We had a little technical glitch a few days ago, and you might have received an e-mail that promised you an entry about mulligatawny soup. We apologize for the blank e-mail, but we will make good on that promise and write you all about our mulligatawny soup adventure very soon. We think it'll be worth the wait, so please stay tuned...

Monday, September 6, 2010

supreme cream scones


Sometimes after a demanding week at work, when my day off comes I wake up and want nothing more than to start a leisurely sunlit morning baking in the kitchen and listening to music. Today I woke up thinking about scones, one of my favorite indulgences whether sweet or savory.

I didn't want to do a scone that had any eggs in it, so I started by sleuthing around a bit online. I found a recipe for scones, sans eggs, originally published in Bon Appétit magazine and available at epicurious.com, and was impressed. It involves a different series of steps than I was familiar with from drop scone recipes I have made before. It is instead a wedge scone recipe, and before baking melted butter is brushed on, and a mixture of sugar and lemon zest is sprinkled on top. Those are the basic concepts I kept from the recipe before customizing it. I was in the mood for pear blueberry scones because I had a big juicy anjou pear I wanted to use. I decided to cut back on the amount of lemon zest suggested in the original recipe so that it wouldn't dominate the other fruit flavors. I used Sucanat instead of a refined sweetener and I think it worked really well.

I also used a new flour I was excited to try. Last time I was at Whole Foods I was looking for an unrefined all purpose flour and found Bob's Red Mill Organic Hard White Whole Wheat Flour which they explain is a recent innovation: a new variety of wheat is used that grinds into a much lighter flour than traditional whole wheat flour. I always have felt conflicted about using whole wheat flour in baking recipes because though I really want the health benefit of the whole grain, I dislike the added density that seems inevitable. But this flour is amazing. It is indistinguishable from all purpose white flour as far as I can tell.

Most importantly, I should mention that these scones turned out truly amazing. My friend and I had them with tea, and she said that they were the best scones she has ever had. Now I am tempted to purchase a proper cast iron wedge scone pan so that I can continue on a quest for ultimate scone perfection.

Pear Blueberry Scones

Ingredients:
2 cups all purpose flour

1/4 cup plus 2 T. Sucanat
1 T. baking powder
1/2 tsp. salt

1 large pear, cored and chopped
1/3 cup frozen blueberries
1 T. lemon juice
2 tsp. grated lemon peel
1 1/4 cups heavy cream

3 T. unsalted butter, melted

Method:

Preheat oven to 425°F. Stir the lemon juice into the blueberries and put aside. Mix 2 cups flour, 1/4 cup sugar, 1 T. baking powder and 1/2 tsp. salt in large bowl. In a second bowl, mix the cream, pear, blueberries, and 1 tsp. of the lemon zest. Add this wet mixture to the dry ingredients and stir just until dough forms. Turn dough out onto lightly floured surface. Knead gently just until dough holds together. Form dough into an 8 or 9 inch diameter, 1/2-inch-thick round. Cut into 8 wedges.

Transfer wedges to large lightly greased baking sheet, spacing evenly. Combine remaining 2 T. Sucanat and 1 tsp. lemon peel in small bowl. Brush scones with melted butter. Sprinkle with Sucanat mixture. Bake scones until light golden brown, about 15 minutes. Transfer to rack and cool slightly. (Can be prepared 1 day ahead. Cool completely. Wrap in foil; store at room temperature.) Serve the scones warm or at room temperature.


Tuesday, August 24, 2010

lemon cranberry quinoa salad

     For a while, Wholefoods was offering a delicious quinoa salad in their prepared foods section. When I ate lunch there, I invariably chose this dish because I would be craving that sweet-tart flavor (and probably the nutritional value of the quinoa) at all other times, and eventually I started buying larger quantities to bring home for the rest of the week. However, the retail price of $8.99 per pound (!) was really starting to add up. On top of that, they didn't always have it, so sometimes I was left standing there in front of the case, hoping upon hope that I had just missed it the first time I looked, scanning the dishes over and over again until I resigned myself, dejectedly, to finding something else to eat.
     In an attempt to make this menu item more readily available and economically sustainable for me, I wrote the store an e-mail requesting the recipe. Although I received a prompt, polite response from the store manager, I was disappointed - dismayed, even - with the answer. Apparently, they were "unable" to share the recipe. That was hard to swallow, because "lemon cranberry quinoa" had become my favorite thing to eat and because I had heretofore been spoiled by the helpfulness of the Wholefoods staff. This policy, however, was blatantly, purposefully unhelpful.
     Since seeking employment at Wholefoods solely to acquire this recipe seemed a little too extreme, Plan B was to try to figure it out myself. Although I had the list of ingredients from the print-out label that the employee stuck on the container, this task was not as easy as it might sound; proportions are everything. Yet finally, after multiple attempts that fell tragically short of the original, I have come up with a very acceptable re-creation. Perhaps there is no greater teacher than the process of trial and error.
     All melodrama aside, now I make this almost every week, and I am proud and excited to share it with you. 

Ingredients:
1 cup yellow quinoa
1 cup water
2 T. lemon juice
1/2 T. ground coriander
1/2 T. ground cumin
2 tsp. paprika
1/2 tsp. sea salt
pepper to taste
Half a red pepper, deseeded and finely chopped
1 bunch (about six) green onions (scallions), thinly sliced
1/2 cup sweetened dried cranberries
1 large handful fresh cilantro, finely chopped

Method:
Soak your quinoa in a bowl of water and rub the quinoa between your fingers a bit to help remove the bitter-tasting saponin that the seed uses as its natural defense against insects. Rinse and drain the quinoa a few more times before cooking.
Bring the quinoa and water to a boil in a covered saucepan, then reduce the heat and simmer for 13 minutes. Set a timer, because mushy, overcooked quinoa really doesn't work for this recipe. If, after 13 minutes, there is still any water left in the saucepan, drain it. Transfer the quinoa to a bowl and allow it to cool.
Toss the cooked quinoa with the lemon juice. Add the coriander, cumin, paprika, salt and pepper and stir to coat evenly. Add the pepper, green onions, cranberries and cilantro and stir to combine.

You can serve this at room temperature or chilled. I usually double this recipe because it keeps well for several days in the fridge and I love having it on hand for lunch. My husband likes to take it with him to work for lunch, too.

For more on the benefits of quinoa, see our previous post on pesto grilled vegetables with Israeli couscous, quinoa and baby chickpeas.

Thursday, August 19, 2010

multigrain blueberry pancakes

"He who goes to bed hungry dreams of pancakes.
- Maltese proverb

Every once in a while on a Sunday morning I'll wake up with an appetite for some pancakes. Although nothing really compares to making pancakes from scratch, Arrowhead Mills makes a delicious Multigrain Pancake and Waffle Mix that is quick and simple to throw together when I'm still bleary-eyed and hungry after sleeping in. This way I can have my pancakes... and my lazy morning, too.

I initially chose this mix because it does not contain eggs, nor does it call for any. It is not vegan because it contains buttermilk and whey, but if, like me, you're trying to keep the eggs and dairy in your diet to a minimum, this is a great choice. The pancakes are delicious, with a bit of a cornmeal flavor that I love. All you need to add is almond milk (or soy or rice milk) and oil. I use grape seed oil because it has a neutral flavor and because it is known to have some health benefits, such as increasing antioxidant levels in the body. As an aside, you may have heard that there is some controversy about negative health effects associated with another common choice, Canola oil. Canola oil (initially a trademarked term, which is why it is capitalized) is extracted from a genetically engineered version of the rapeseed plant, but the claims about its detrimental effects are widely disputed. Because the idea of genetically modified food freaks me out a little, while the jury is still out I'll stick to grape seeds.


Combine 1 1/2 cups of the pancake mix with 2 tablespoons of grape seed oil and 1 cup of almond milk, adding more milk as necessary. Just before cooking, stir a half cup of fresh blueberries into the batter. (If you're using frozen blueberries, soak them in some hot water for a few minutes to defrost before using.) Then proceed as usual to cook the batter. This makes enough pancakes for two people.

I like to serve the pancakes with some fresh orange banana pineapple juice, which I make in my VitaMix blender. I'll write a separate post soon on making juice with a VitaMix, so for now I will just say this: Unlike other kinds of juicers, which extract primarily only the fruit's water and sugar for you to drink, leaving the pulp fiber behind for the garbage, the VitaMix is able to liquify the whole fruit, including the fiber and skins - where most of the nutrients reside - so your juice is much more nutritious.

Serve these pancakes topped with extra blueberries and some nice maple syrup or raw honey.

Tuesday, August 3, 2010

roasted root veggies

One of my most used recipes is this one for roasted root vegetables out of the How to Cook Everything cookbook by Mark Bittman. It is very easy, very customizable, and the end result looks a little fancy and is delicious. I love that I can choose whatever vegetables appeal to me. I take the author's advice and usually include carrots and onions in the mix along with some kind of potatoes. I personally also try to always add turnips and rutabagas, since I don't use these great tubers enough otherwise.

For the batch I prepared and photographed above, I used a mix of fingerling potatoes and miniature onions procured from the Molto Farmer's Market here in Las Vegas. This weekly event was started by Mario Batali and his restaurant team as a way to bring fresh sustainable produce to the area. On the day Stefanie and I visited, we also picked up some purple carrots, black radishes, fermented black garlic (heavenly!), heirloom tomatoes, and some other wonderful treats.


Regarding the recipe, you will see that the directions are specific about the quantity of vegetables to use, but for a long time I have measured by how much will fill my 10-inch cast iron skillet. Of course, cast-iron isn't required, but I do think it is the best choice if you have one because some magic happens there. The other personal touch I have been adding lately is improvising a mustard sauce to have on the side. If you are interested, I give some approximate proportions for that at the end.

Roasted Root Vegetables

4 Tbs. olive oil
1 1/2 to 2 lbs. mixed root vegetables, such as carrots, potatoes, sweet potatoes, parsnips, turnips, shallots (leave whole), and onions, peeled and cut into 1 1/2 to 2 inch chunks
Several sprigs fresh thyme or about 1 Tbs. fresh rosemary leaves (optional)
Salt and freshly ground black pepper to taste
1 head garlic, broken into cloves (Leave the garlic unpeeled.
You peel each clove before you eat it.)
Minced fresh parsley leaves for garnish

1. Preheat the oven to 425°F. Place the olive oil in a large roasting pan on top of the stove and turn the heat to low. When the oil is hot, add all the vegetables (except the garlic), along with the thyme or rosemary. Sprinkle them with salt and pepper and cook them briefly, shaking and stirring so that everything is coated with oil. Place the pan in the oven.
2. Cook for 30 minutes, opening the oven and shaking the pan once or twice during this period. Add the garlic and stir the vegetables up; at this point they should be starting to brown. If they are not, raise the oven temperature to 450°F.
3. Continue to cook, stirring and shaking every 10 minutes or so, until the vegetables are tender and nicely browned, at least another half hour. If the vegetables soften before they brown, just run them under the broiler for a minute or two. If they brown before they soften, add a few Tbs. of water to the pan and turn the heat down to 350°.
4. Garnish and serve hot or at room temperature.

Simple Mustard Sauce
6 Tbs. olive oil
2 Tbs. red wine vinegar
1 Tbs. Dijon mustard
1/4 tsp. salt
1/4 tsp. dried tarragon
Whisk ingredients together until they are completely amalgamated into a creamy sauce. A small blender like the Magic Bullet is ideal here.

Thursday, July 22, 2010

roasted sweet potato sandwich on homemade focaccia


This past spring Dennis and I traveled to Sedona, Arizona, where we were very graciously hosted by my friend, Meredith. Sedona itself is amazingly beautiful. Its distinctly southwestern architecture is so unobtrusive, it seems to disappear into the landscape, and the dramatic backdrop of peculiar, bold-colored rock formations, dotted with rich green pines, junipers, cacti and succulents, all set against an impossibly blue Arizona sky, create an idyllic setting for a weekend getaway. We will definitely be going back.


We were fortunate to have Meredith's insider viewpoint on what is, understandably, a heavily touristed town. Following a Saturday morning hike, Meredith took us to lunch at a beautiful little cafe called Wildflower Bread Company. It was there that I had one of the most delicious sandwiches I have ever eaten, a menu item they call "Roasted Sweet Potato," featuring, as you might expect, sweet potato, as well as fresh mozzarella, fig confit, tomato, arugula, marinated fennel and balsamic vinaigrette on herb focaccia. I insisted we return the next day so that I could enjoy it one more time before we headed back to Las Vegas, and as I finished my last bite I became determined to try to reproduce this fabulous combination of flavors at home. I'm proud to announce that Katherine and I did manage to create a respectable version of our own and we're very excited to share it with you.

The first task at hand was to bake our own focaccia. We used a recipe from the Food Network site, with a few minor adjustments. Instead of 2 tsp. of rapid-rise yeast, we used 3 tsp. of active dry yeast (and allowed the yeast to stand in warm water for a longer period of 10 minutes). We replaced the standard sugar with turbinado, and changed the flour quantities to 2 c. all purpose flour and 1 1/2 c. whole wheat flour. Of course, if you're short on time, any nice store-bought artisan bread will do.

The rest was relatively easy. I cut a sweet potato lengthwise into half-inch-thick slices, lined a baking pan with aluminum foil, laid the slices out in a single layer, brushed them with olive oil and sprinkled them with sea salt, then roasted them in the oven at 425 degrees, flipping them once part way through, until they began to brown and the flesh was soft. In the meantime, Katherine was busy caramelizing some onions, a process she will describe for you below.

Once all the ingredients were prepared we assembled the sandwich, starting with a layer of royal fig fruit spread I found at Wholefoods, followed by a slice of roasted potato, a layer of fresh mozzarella, then arugula tossed with a balsamic vinaigrette dressing, and finally a generous helping of caramelized onions. I also recommend spreading the top slice of bread with more balsamic vinaigrette to intensify the balsamic flavor, if you're a fan like we are.

Katherine, about to enjoy the fruits of our efforts

Katherine's Note: I was in heaven to make these sandwiches with Stefanie. And I loved making foccacia from scratch, enough to make me wonder why I don't do this every day. It is such a decadent kind of bread to bake, with the rich aromas and flavors from the olive oil and rosemary.

The biggest secret about making great caramelized onions is patience. It takes a long time compared to other kitchen tasks for the onions to cook down. I usually use one large or two medium sized onions. I cut these in half and slice them. Then I add a couple of tablespoons of oil to a skillet set to medium heat, add the onions, and cook them until they start to brown, approximately 15 minutes. It is important to stir frequently. The final touch for me is to throw in a tablespoon of balsamic vinegar, and a bit of sugar. I think I used roughly a 1/2 tbsp of Rapidura. Then I let this cook for another few minutes until the onions are nicely glazed.


A former chef I know once told me he likes to make a batch of caramelized onions regularly to keep in the fridge to serve along with all kinds of dishes, and it makes sense to me.


I want to lastly send some gratitude out to my friend Ayla, who I just realized takes me to a different location of Wildflower Bread Co. when I visit her in Tempe, AZ, and we pair it with visiting the most wonderful bookstore, Changing Hands, next door.


Saturday, June 19, 2010

pesto grilled vegetables with israeli couscous, quinoa and baby chickpeas


"Brevity is the soul of wit."

So William Shakespeare wrote in his timeless play, Hamlet. Admittedly, wit is not my strong point, and perhaps being long-winded is where I go astray. I brainstormed for a long time about a more succinct title for this post, but in the end I was willing to forego cleverness in favor of capturing the soul of this recipe. In the interest of clarity and informativeness, I give you Pesto Grilled Vegetables with Israeli Couscous, Quinoa and Baby Chickpeas. If you're the impatient type, I'll throw you a bone. This recipe is quick enough to make for lunch.

The inspiration came from a package of "Harvest Grains Blend" I picked up at Trader Joe's. It's a mixture of Israeli couscous (which is basically tiny round pasta balls), orzo (rice-shaped pasta also known as risoni), baby garbanzo beans (also known as chana dal) and red quinoa. The brilliant thing about this blend is that all of these "grains" take about the same amount of time to cook. I find that this mix is a little short on the quinoa, so I supplement from my own stash. Quinoa, by the way, is a superfood, with very high protein content and a unique combination of amino acids, such that NASA is considering it for its Controlled Ecological Life Support System [more on the benefits of quinoa]. Just like Tang, if it's good enough for astronauts, it's good enough for me. (All right, in the interest of full disclosure, I've never tasted Tang and I don't blindly follow celebrity endorsements, but hopefully if you haven't already tried quinoa, you'll give it a go. It's delicious and really good for you.)


I grill my veggies on a George Foreman Grill. It sits on my kitchen counter and gets a lot of use in the summertime. If you don't already own one, I highly recommend it; just make sure you get the model with the removable grill plates, because otherwise it's a real pain in the neck to clean. This reminds me of a quote from one of my favorite comedians, the late Mitch Hedberg. "This shirt is dry clean only... which means it's dirty." Infer what you will.

The exact proportion of veggies to grains doesn't really matter here. You can't go wrong; these quantities are provided as a guideline. If you don't usually work with asparagus, here's how to prepare it: Hold the spear at both ends and bend it until it breaks. The natural breaking point is where the tough, woody part ends and the soft, yummy edible part begins. This tip came to me courtesy of my brother-in-law Ed, a former NYC chef. Thanks, Eddie!

One more note: This recipe is vegan except for the Parmesan cheese on top (and maybe the pesto sauce depending on your choice of sauce). I think the cheese is essential to the flavor of the dish, but if you're vegan, I'm sure you already know of a few alternatives. Some high-quality sea salt should do the trick, for example.


Ingredients:
- 1 cup Trader Joe's Harvest Grains Blend (or your own mixture of Israeli couscous, orzo, baby chickpeas and red quinoa)
- 1/4 cup (additional) red quinoa
- 1 3/4 cup water
- 1 tablespoon olive oil
- 1 red pepper, deseeded and sliced into rounds
- 1 zucchini, sliced into rounds
- 12 asparagus spears, broken to remove the woody bottom part
- Half a small eggplant, sliced into rounds
- 6 stuffing-sized portobello mushrooms, sliced
- Half a large red onion, sliced into rounds
- 3 tablespoons of pesto sauce (I recommend Basiltops Dairy-free Vegan Pesto, which I get at WholeFoods, but any ready-made pesto sauce will do... or of course you can make your own)
- Freshly grated Parmesan
- Salt and pepper to taste

Method:
Put the water, olive oil and grains into a saucepan and bring to a boil. Cover, reduce the heat, and simmer for about 13 minutes.
While the grains are cooking, heat up the grill, slice up your veggies and toss them on. I brush them with olive oil and sprinkle them with salt once they're on there. Keep an eye on them, as different veggies take different amounts of time to cook. Once they're grilled, chop them up into smaller pieces. By now, the grains will be done (I recommend tasting them to be sure - all the water should have evaporated), so add your chopped grilled veggies right to the cooking pot, and then your pesto sauce. Stir to combine. Spoon the mixture out into bowls and top with some freshly grated Parmesan cheese.

Katherine's Note:
I think this little recipe is deserving of its long magnific title; it is so awesomely easy and delicious. I love TJ's for offering such a creative and appealing mix with this blend. I looked around online to see if anything else is written about it, and someone suggested incorporating it into a soup, which I think is a good idea also.

It is fun to read that NASA article about the potential use of quinoa on the long space mission. It is actually an easy-to-read and informative summary about the grain. I am a big fan of having quinoa as a breakfast cereal, and I had read somewhere that it is important to rinse it in cold water before using, but didn't remember why. In the NASA article, it's explained that the grain has a coating of saponin glycosides, a bitter chemical that the plant naturally uses to deter insects. These saponins can presumably interfere with digestion, and may taste bitter anyway, so be sure to rinse.

And I am happy too that you brought up the long term space mission because it gives me a chance to plug one of the best short stories I have read in recent years: Lostronaut, by Jonathan Lethem. Luckily it is available online. If you are a lover of fiction, check it out.

Sunday, May 30, 2010

carrot-oat cake


I have only recently noticed that Whole Foods provides a large selection of recipes on its website. The first one I saw was for this vegan carrot-oat cake, and I immediately wanted to try it. I have already made it a few times, and am quite pleased with this healthful treat.

I love classic carrot cake, and one of my favorite recipes back in the day was the version in the Moosewood Cookbook, which calls for 3 sticks of butter and 4 eggs. Then, of course I wanted homemade cream cheese frosting, which I believe had equal parts butter and cream cheese, and a load of confectioners sugar.

Needless to say, a recipe like that is really best for special occasions, ideally for a large group of people so that there isn't any leftover in the fridge tormenting you. This recipe though, is the perfect alternative dessert, satisfying yet wholesome. I am thinking about how to convert Molly Katzen's inspired but rich banana bread recipe in this same way.

I like the recipe as it is. I love to toast the coconut a bit on medium low heat before baking to enhance the flavor, just until the color changes slightly from white to a creamy light tan. Also, I used golden raisins instead of currants. (I actually made these myself out of green grapes, but that is totally unnecessary. I am just in love with my dehydrator.) Lastly, I used a larger pan than the recommended 9" square, which makes for thinner bars, so I decreased the cooking time 15 minutes. I think mine is around 8"x 12"

Ingredients:

1 cup rolled or quick cooking oats
1 cup chopped walnuts
1 cup whole wheat pastry flour
2 teaspoons baking powder
1 teaspoon baking soda
1 teaspoon ground cinnamon
1/2 teaspoon ground ginger
1/2 teaspoon salt
2 cups grated carrots
1 cup pure maple syrup
1 cup dried currants
1/2 cup unsweetened finely shredded coconut
1 1/2 teaspoons vanilla extract

Method:

Preheat oven to 325°F. Lightly oil a (9-inch) square baking pan and set it aside.

Pulse oats and walnuts in a food processor until coarsely ground. Transfer to a large bowl. Add flour, baking powder, baking soda, cinnamon, ginger and salt and mix well. In a second large bowl, combine carrots, maple syrup, currants, coconut and vanilla. Add carrot mixture to flour mixture and stir until completely incorporated. Transfer to prepared pan and bake until cooked through and deep golden brown, about 1 hour. Set aside to let cool before cutting into squares.


Friday, May 28, 2010

curried cauliflower

One of my favorite cooking blogs is 101cookbooks.com. The author, Heidi Swanson, maintains a fabulous collection of healthy recipes that have been a source of inspiration for me since I first discovered her blog a little over a year ago. She's also a talented photographer and accompanies each blog entry with one or more beautiful photos of her culinary work, artfully presented. Consequently, being a photography enthusiast myself, the inspiration I take from her extends beyond the kitchen. Many of the recipes she has posted have become part of my regular cooking repertoire, but the one I am sharing today is truly among my favorites. She calls the recipe Feisty Green Beans, and she found it in a book called Easy Green Organic by Anna Getty. I prefer to make this dish with cauliflower instead of green beans, which Heidi suggests as a variation. I've tried both and prefer the texture of the cauliflower here. I've also made it vegan, but it's just as easy to add the dairy products right back in if that's your preference (see original).

Ingredients:
1 small head of cauliflower, cut into florets1/2 t. paprika2 T. Earth Balance vegan buttery spread
1/2 c. golden raisins1 t. ground cumin1/3 c. coconut milk
1 T. olive oil1 t. ground coriander1/4 c. sliced almonds
2 cloves garlic, thinly sliced1/2 t. curry powder1 handful finely chopped fresh cilantro
1/2 medium yellow onion, finely diced1/2 t. sea saltsalt and pepper to taste
3 bay leaves1/4 t. cayenne pepper
1/3 c. white wine6 oz. extra-firm tofu cut into half-inch cubes
Method:
Remove the block of tofu from the packaging, drain the water, cut it in half (save half for later - you can store it in the fridge in a container with a lid, covered with water), wrap the half you're using with a clean towel, place it under a heavy object, and let it sit for a while to squeeze out the extra water. Wash your fresh cilantro, pick off the leaves and chop them up until you have about a large handful. Slice your garlic and dice your onion. Start a pot of boiling water on the stove and salt it well. While it's heating, chop up your head of cauliflower into small florets and then wash them. If you found a large head, only use 3/4 of it and save the rest for later. Once the water is boiling, toss your cauliflower in, but only let it boil for a minute, just enough for it to lose its raw edge. Drain and plunge the cauliflower into ice water so it stops cooking. Alternatively, you can just rinse it thoroughly with cold water. Set aside.
Heat about a cup of water in a tea kettle or whatever you have handy, until it boils. Place the raisins in a small bowl and cover them with the hot water; let sit for five minutes, drain and then set aside.
Heat your largest skillet over medium heat. I use a saute pan. This is a lot of food and you need to be able to stir it around. When the pan is hot, add the oil, garlic, onion and bay leaves. Cook for 5 minutes, or until the onions and garlic start to brown a little bit. Add the wine and cook until it has mostly evaporated.
While it's cooking, unwrap your halved block of tofu and chop it into small cubes.
Remove the bay leaves from the pot - but be careful not to burn yourself. Stir in the paprika, cumin, coriander, curry powder, salt and cayenne pepper. Stir in the tofu cubes and the raisins and cook until heated through, about a minute or two. Add the cauliflower and then the vegan butter. Stir until the butter has melted. Remove from the heat source and stir in the coconut milk, then most of the almonds and most of the fresh cilantro. Add salt and pepper to taste.
Spoon the mixture into bowls and top with the remaining almonds and cilantro.
This will serve about three or four people as a main dish. To stretch it further, you could serve it with rice.

Side note: If you've never heard of Earth Balance Natural Buttery Spread, you might be a little put off, like I was at first, by the name. "Buttery Spread" sounds like an empty promise, like some frightening chem lab concoction reminiscent of the way Cheez Whiz isn't really "cheese"... Well, if that's the case, then you should know that Earth Balance is made with natural vegetable oils, is not hydrogenated and has no trans-fats or anything gross like that. I recommend it if you're trying to cut dairy out of your diet, because it's pretty tasty. On the other hand, if you're okay with dairy, then you can just use regular butter (preferably organic, unless you like antibiotics and synthetic hormones in your food), or you could also try ghee, which is "clarified" butter, meaning that the milk solids have been removed.

Thursday, May 13, 2010

multigrain rolls

"Hide Bread" from the Big Sur Bakery


This recipe originally came from The Big Sur Bakery Cookbook, a visually stunning cookbook that also tells the story of the restaurant’s proprietors and life on California’s central coast. The recipe came from one of the friends of the Bakery, Terry “Hide” Prince; however, take warning from the name, as you’ll probably need to hide some of these away from the rest of your family if you want to have any left for yourself.

These rolls, densely brimming with grains and seeds, are akin to English muffins, in that you have to toast them before you eat them. That being said, Thomas’ pale in comparison – both literally and figuratively. No yeast is required; this is soda bread at its finest. Choose a dark beer that you would like to drink, but if you have an aversion to using alcohol I believe water is an acceptable substitute, although I have not tried this myself. Try not to be daunted by the long list of ingredients. Almost all of them can be found at any decent supermarket, and those you can't find - particularly the grains and seeds - can be substituted with any others. The actual process is surprisingly simple and when you consider how amazing these taste, you'll see that they are entirely worth the effort.

Katherine and I have made these together a handful of times, and have come to take great liberties with the recipe. For one, we’ve veganized it, substituting coconut milk for the buttermilk recommended in the original. If you are concerned, don’t be. No coconut taste remains. Otherwise, we’ve altered (read: significantly increased) the amount of grains and seeds, such that the rolls just barely hold together after they're baked, but what this version lacks in structural integrity, it more than makes up for in flavor. The following is our own version of these delicious rolls:

Ingredients:
4 cups all-purpose flour1/2 cup sunflower seeds2 tablespoons dulse flakes
1 cup (sprouted) whole wheat flour1/2 cup quinoa1 teaspoon baking soda
1/2 cup flax seed (meal)1/3 cup millet1/2 cup dark beer
1/2 cup sesame seeds1/4 cup amaranth2 cups coconut milk
1/2 cup oat bran1 teaspoon sea salt

Method:
Preheat the oven to 375 degrees. Line two baking sheets with parchment paper.
In a frying pan, toast the flax seeds until just warm. Grind them into a meal using a small blender or spice/coffee grinder. (We recommend using the Magic Bullet with the flat blade.) Use the same pan to toast the sesame seeds, oat bran, sunflower seeds, quinoa, millet and amaranth.
Combine all the dry ingredients in a large bowl, stir them together and make a well in the center. Add the beer and coconut milk and mix with a wooden spoon and eventually your hands, until a thick dough forms. Sprinkle the dough with flour and turn out onto a floured surface, then roll into a log about 2 inches in diameter. Of course, you can work with half the dough at a time, if that's more manageable for you. Cut the roll(s) into 1.5-inch slices, then form them into patties with your hands. Place the patties on a baking sheet and bake for 45 minutes.

A few other notes: Most recently, I used sprouted whole wheat flour for the wheat flour in the recipe. While this almost certainly added nutritional value to the rolls, it did not alter the taste much, as compared to using regular whole wheat flour, so the regular stuff works just fine. The original recipe called for whole flax seeds, but unless they're ground, those tend to pass right through the digestive system without imparting their myriad benefits. Toasting the seeds and grains beforehand is optional but recommended (this was Katherine's idea and it's brilliant), as doing so brings out a toasty, nutty flavor that is just wonderful. Finally, the dulse (seaweed) can be found at a health food store (see photo so you know what you're looking for - you may have to crumble it into pieces by hand in order to measure it in tablespoons, or you can buy it already in flake form).


To serve these, you'll need to toast them first. Then, they taste amazing smeared with ghee (clarified butter) and some raw honey, but you should feel free to experiment with the toppings.


Wednesday, May 12, 2010

spring kicharee


Kicharee is a special Indian dish that is highly lauded for its therapeutic benefit. It is a very simple preparation of cooked mung beans and rice sauteed with ghee or oil and spices. According to herbalist Michael Tierra, "Kicharee is well balanced and high in easily assimilated protein. It also has blood purifying properties." He says that it "can be eaten everyday as a healing food, for fasting, establishing pH balance, for a mono-food cleansing diet, or for those recovering from a serious illness or surgery."

I have been regularly following the blogs of Michael and Lesley Tierra as part of my herbalist training, and recently, in a post called Diet and Herb Tips for Spring Health, they offered a unique Spring Kicharee recipe that expands the basic recipe to include several vegetables: "Burdock to cleanse the Liver and Blood, carrots to support digestion and fluid metabolism, shiitake mushrooms to strengthen Blood and immunity and support Liver function and kelp and dark leafy greens to detoxify the Liver and provide important minerals."

Here is their recipe:
  • 3 cups water or chicken stock
  • 1/2 cup rice
  • 1/2 cup mung beans
  • 1 small strip kelp, washed
  • 1/3 tsp. turmeric powder
  • 1 tsp. coriander powder
  • 1 tsp. cumin seeds or powder
  • 2 Tblsp. ghee (clarified butter) or sesame oil
  • 1 onion, diced
  • 4 shiitake mushrooms, sliced
  • 1 burdock root, scrubbed and thinly sliced
  • 1 carrot, thinly sliced
  • 1 cup chopped dark leafy greens (dale, collards, dandelion, mustard)
  • Seasonings: salt, lemon juice
"Cook rice, beans and kelp in water or stock for 45 minutes. Brown spices in oil. Stir fry onion, mushrooms, burdock and carrot in spiced oil. Boil greens in an inch of water for five minutes and strain. Combine all ingredients together. More water or stock may be added to make soupier, if wanted. Add any desired seasonings."


Stefanie and I worked on this recipe last week. I started the night before by pre-soaking the mung beans and rice separately since I have read often that this step unlocks the dormant energy in these foods by beginning the germination process, and also makes them more digestible. Then when we got started we cooked these in some homemade vegetable broth with the strip of kelp (kombu). I have been adding kelp to my beans for a while now, since I read Paul Pitchford's comment, in Healing with Whole Foods, that kelp is "excellent added to beans, as the minerals help to balance the protein and oils in them and increase digestibility."

I was curious and intrigued about cooking with the fresh burdock root. Over the years, I had tried the dried burdock in different tea blends, and wondered if the fresh vegetable would have the same strong bitter flavor I remembered. I also didn't know where to find it. I figured Whole Foods was my best bet, but I looked over the whole produce area a couple times and couldn't see it. I asked an employee, and she said that yes, they had it but she would have to get it from the back, and a few minutes later she returned with two long pieces, each over two feet long. I asked her why it wasn't out on the shelves and she said that they didn't think it fit in right with everything else.

I think she was referring to the truth that burdock is a very humble looking vegetable, but when we prepared the kicharee we found that it is impressive in its own earthy way. It has an appealing pungent aroma and taste similar to artichoke. And in the dish its crispy texture contrasted well with the chewy yet equally earthy shiitake mushrooms. In the background the ghee and spices elevated all the ingredients to something satisfying and soulful.

We were happy with our results. In fact, during the research for this post I found another variation by Michael Tierra from a long time ago, and I would love to try that one soon.


Stefanie's note: It might be worth noting that we sprinkled the dish with bit of sea salt, which really brought out the flavor. This is a delicious meal. It is easy to understand why kicharee makes a good single-food diet when detoxifying or healing. My body clearly felt so happy and comfortable digesting this food and it felt very nourishing to eat it. Additionally, on a more intangible level, I believe the mushrooms, burdock root and carrots, which of course grow in the earth, are all very grounding and stabilizing for one's spiritual and emotional well-being.